In the last step of the new object creator and the mass object upload creator, the editor can choose the “Send later” option. With that option selected, all information related to the object will be saved on the computer drive, and the creator will be closed. The object is not entered into the system (the object creation is postponed), so the editor does not have to wait for the object to be created (which takes especially long when the files are big). Such an object is placed on a special list of objects prepared for sending. That list is managed in the object sending window (see the image below), which is opened by selecting the “Send objects” item from the “Tools” menu.
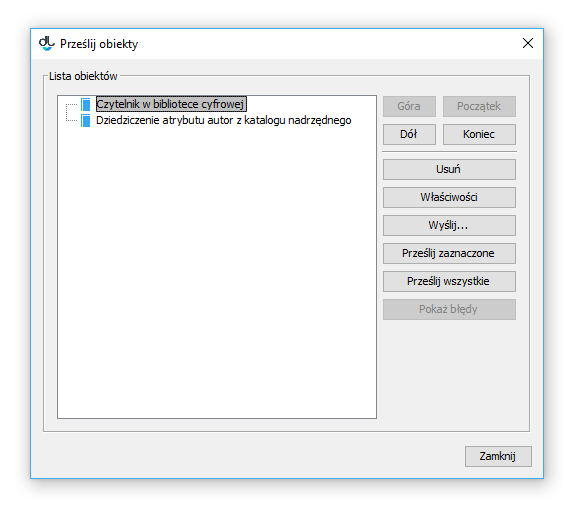
The object sending window
In the object sending window, on the left, there is a tree of objects prepared for sending. On the right, there is a set of buttons for managing the list. The “Up”, “Down”, “Home”, and “End” buttons are for changing the position of items selected on it. The “Remove” button is for removing the selected item (all information related to it will be irretrievably lost). Objects can only be rearranged and removed at the highest level of the tree (the list of subordinate object of a newly created group object cannot be changed).
The “Properties” button is for modifying the properties of the selected object. When the “Send selected” button is clicked, the process of creating all objects selected on the list is started up, and a dialog box with object creation progress is displayed. That box can be minimized (in such a case, the progress is visible on the application status bar in the bottom right-hand corner) so that the editor may continue working in the application while the object is being created in the background. In order to display the progress box again, the editor has to select the “Send objects...” option from the “Tools” menu. When the “Send all” button is clicked, the process of creating all object from the list is started up, and a dialog box with the progress of the object creation process is shown. That window can be minimized so that the editor can continue working in the application while the objects from the list are being created in the background. In order to display the progress box again, the editor has to select the “Send objects...” option from the “Tools” menu. When using the “Send...” button, the editor can specify a date and time in the future for sending the objects. When that button is clicked, there appears a window for entering additional parameters for the sent objects (see the image below).
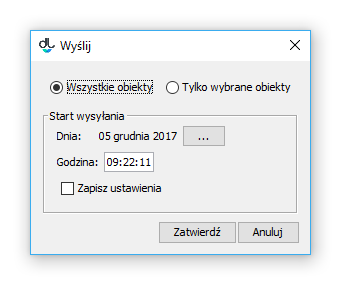
The window with the parameters for sending objects
The parameters include: first, the number of objects to be created (the “All objects” option for all objects from the list versus the “Only selected objects” option for only the objects selected in the tree on the left); second, the date and time of the beginning of the process of object creation, and, third, the “Save settings” checkbox for saving user preferences for the future (so that the same time and number of days before sending are used when the function is started up again). Those parameters make it possible to, among other things, distribute the load of the server over time (for example, every editor can be ascribed a different hour for sending the objects he or she has prepared during the day). Once the parameters have been confirmed, there appears a box with the time left until the startup of the object creation process. When that time has passed, the process is started up. The window can be minimized so that both the waiting process and the creation process run int he background. In order to display the progress box again, the editor has to select the “Send objects...” option from the “Tools” menu.
The last button, “Show errors”, is only useful in the case when errors have occurred during the object creation process. The objects the sending of which was unsuccessful are marked with an error icon on the object list. When the editor selects such an object and clicks the “Show errors” button, the sending errors are displayed. The editor may try to correct them by modifying the properties of the object (the “Properties” button).