Adjusting the Look of the Reader Application
Adding and Modifying Content in a Component
Most data displayed by the reader application is downloaded from the dLibra system server. Some examples of such data are collections, digital objects, or attribute values. However, the user’s own, non-standard content can be added, and the manner in which the existing content is displayed can be changed in any place of the displayed HTML code.
Example: We want to place an image – which presents the employees of the institution – on the “Contact” page.
- We open the “Contact” page and verify the name of the page in the address bar – for example, for the https://example.com/dlibra/contact?Ianguage=pl address, the page name in the reader application will be “contact”.
- We open the /WEB-INF/pages.xml file and find the <page name="contact" layout="home_layout" secure="true" inherits="base-page"> line. In that section, there are all the available components for the “contact” page. We are interested in the only ContactComponent component. Apart from its components, the contact section uses components from the base-page section (but we do not want to modify it in any way). The section for the home page – for example, https://example.com/dlibra/ – is here called “main” (we do not want to modify it, either). For making other changes, it may be useful to know that the “contact” page is embedded in the home_layout template. We can introduce changes in that template as well. We will find it in the /WEB-INF/layout/templates directory. Before a modification, a backup of the directory should be made.
- We unpack the/WEB-INF/lib/dcore-webapp-components-6.0.0.jar archive. Having done that, we copy the ContactComponent.vm file to the /WEB-INF/components/templates directory.
- From that time on, we can make any changes in the ContactComponent.vm file. The changes will have an impact on the content displayed on the “Contact” page. When the ContactComponent.vm has been removed from the /WEB-INF/components/templates directory, our changes will disappear, and the default manner of displaying content will be restored.
- In the /WEB-INF/components/templates file, we search for a place in which we would like to add the image and add the appropriate HTML fragment, for example: <img src="example.com/pracownicy.png"/>
Adding a New Component to a Subpage
If we decide that we want to add our own data, static or downloaded with the use of a remote API, we can create our own component.
Example: We want to display weather data on the home page, for English-speaking guests.
In the /WEB-INF/components/templates , we create a WeatherComponent.vm file, with the following content.
WeatherComponent.vm<div #if($userLanguage != "en") style="display:none" #end id="WeatherComponent"></div>
We create the /style/dlibra/custom/js, directory containing the WeatherComponent.js js file with the following content (the script downloads the weather data from an external Yahoo server and displays them on our page, in the selected place).
WeatherComponent.jsvar dlibra = dlibra || {}; dlibra.WeatherComponent = { init: function () { $.get( "https://query.yahooapis.com/v1/public/yql?q=select%20*%20from%20weather.forecast%20where%20woeid%20in%20(select%20woeid%20from%20geo.places(1)%20where%20text%3D%22poznan%2C%20pl%22)&format=json&env=store%3A%2F%2Fdatatables.org%2Falltableswithkeys", function( data ) { var description = data.query.results.channel.item.description.replace("<![CDATA[", "").replace("]]>", ""); $('#WeatherComponent').html(description) }); } } $(function () { dlibra.WeatherComponent.init(); })We edit the /WEB-INF/layout/templates/home_layout.vm file and, just before closing the “body” tag, add our script.
home_layout.vm<script src="${homepageUrl}/style/dlibra/custom/js/WeatherComponent.js" type="text/javascript"></script> </body>We add the WeatherComponent component to the home page. For that purpose, we look for the “main” section which corresponds to the home page, in the /WEB-INF/pages.xml file. We add another component inside components.
pages.xml<page name="main" layout="home_layout" inherits="base-page"> <actions> <action name="ChangeLanguageAction"/> <action name="LogoutAction"/> </actions> <components> <component name="pl.psnc.dlibra.web.comp.pages.components.LatestEditionsComponent"> <place>topSplit</place> <position>1</position> </component> <component name="pl.psnc.dlibra.web.comp.pages.components.NewsComponent"> <place>topSplit</place> <position>2</position> </component> <component name="pl.psnc.dlibra.web.comp.pages.components.WeatherComponent"> <place>main</place> <position>1</position> </component> <component name="pl.psnc.dlibra.web.comp.pages.components.CollectionsPresentationComponent"> <place>main</place> <position>2</position> </component> <component name="pl.psnc.dlibra.web.comp.pages.components.PopularEditionsComponent"> <place>main</place> <position>3</position> </component> <component name="pl.psnc.dlibra.web.comp.pages.components.RecommendedComponent"> <place>main</place> <position>4</position> </component> </components> </page>
We ought to remember to assign a higher position to the remaining components the place of which is also “main”, so that every component has a different position.
The system will display the weather information for English-speaking guests on our site.
Przykładowy komponent pogody 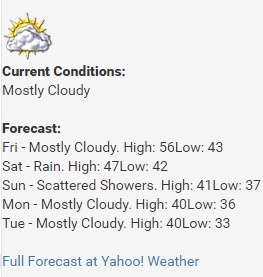
Removing a Component from a Subpage
For various reasons, a digital library administrator may decide to remove some components. There are two methods of removing a component:
- by commenting it out in file /WEB-INF/pages.xml (this is a safer method because it allows the administrator to restore the component) or
- by removing the component from file /WEB-INF/pages.xml
Example: We decide to hide the component with the most popular objects displayed on the home page.
We open the /WEB-INF/pages.xml file and look for the main section which contains the components displayed on the home page. We comment the PopularEditionsComponent component with the <!— <component>...</component> —> comment, as shown in the file below.
pages.xml<page name="main" layout="home_layout" inherits="base-page"> <actions> <action name="ChangeLanguageAction"/> <action name="LogoutAction"/> </actions> <components> <component name="pl.psnc.dlibra.web.comp.pages.components.LatestEditionsComponent"> <place>topSplit</place> <position>1</position> </component> <component name="pl.psnc.dlibra.web.comp.pages.components.NewsComponent"> <place>topSplit</place> <position>2</position> </component> <component name="pl.psnc.dlibra.web.comp.pages.components.CollectionsPresentationComponent"> <place>main</place> <position>1</position> </component> <!--<component name="pl.psnc.dlibra.web.comp.pages.components.PopularEditionsComponent"> <place>main</place> <position>3</position> </component>--> <component name="pl.psnc.dlibra.web.comp.pages.components.RecommendedComponent"> <place>main</place> <position>4</position> </component> </components> </page>
Setting a Component in a Layout
Każdy komponent ma swoje ściśle określone miejsce w layoucie strony. Informację o tym, w którym konkretnie miejscu layoutu znajduje się dany komponent możemy sprawdzić w pliku pages.xml. Tam możemy również wskazać inne miejsce wyświetlania się komponentu.
Przykład: Decydujemy się przenieść komponent z aktualnościami w zupełnie inne miejsce na stronie głównej.
- Otwieramy plik pages.xml
- Szukamy sekcji main, w której zawarte są komponenty znajdujące się na stronie głównej.
- Odczytujemy nazwę layoutu z pola layout. Domyślna nazwa layoutu dla strony ma wartość home_layout.
- W sekcji main odszukujemy interesujący nas komponent z aktualnościami pl.psnc.dlibra.web.comp.pages.components.NewsComponent, któremu chcemy przypisać nowe położenie w layoucie home_layout. Miejsce dla naszego komponentu z aktualnościami odczytujemy z pola place. Domyślnie będzie to wartość topSplit. Kolejność sprawdzamy w polu position i domyślnie będzie to wartość 2. Pierwszym komponentem wyświetlanym w miejscu topSplit jest komponent z ostatnio dodanymi obiektami.
Modyfikujemy wartość pola place wewnątrz danych komponentu pl.psnc.dlibra.web.comp.pages.components.NewsComponent. Wartość place zmieniamy na myPlace, a wartość position zmieniamy na 1.
pages.xml<component name="pl.psnc.dlibra.web.comp.pages.components.NewsComponent"> <place>myPlace</place> <position>1</position> </component>
Otwieramy plik /WEB-INF//layout/templates/home_layout.vm i w nim umieszczamy poniższy kod w dowolnym miejscu.
home_layout.vm#foreach( $comp in $myPlace) $!{comp.RenderedTemplate} #endSpowoduje to, że na stronie głównej wyświetlą się wszystkie komponenty, których pola place mają wartość myPlace. W tym nasz komponent z aktualnościami.
Modyfikacja oraz dodawanie komunikatów językowych
Każdy komunikat w aplikacji czytelnika jest wyświetlany w formie wielojęzycznej. Oznacza to, że w zależności od wyboru języka strony, komunikat będzie się wyświetlać w innym języku.
Przykład: W stopce chcemy zawrzeć klauzulę: "Wszelkie prawa zastrzeżone".
- Szukamy pliku, w którym umieszczone są informacje na samym dole strony. Analizując plik /WEB-INF/layout/templates/home_layout.vm dowiemy się, że za wyświetlanie stopki jest odpowiedzialny plik /WEB-INF/layout/templates/parts/footer.vm.
W pliku /WEB-INF/layout/templates/parts/footer.vm dodajemy nowy wpis
Odwołanie $res.get('Home.Copyright.clause') będzie wyświetlać naszą klauzulę w różnych językach. Niezbędne jest ich zdefiniowanie.Otwieramy plik /WEB-INF/layout/resources/layout_pl.xml i dodajemy tłumaczenie dla języka polskiego
layout_pl.xml<entry key="Home.Copyright.clause">Wszelkie prawa zastrzeżone</entry>
Otwieramy plik /WEB-INF/layout/resources/layout_en.xml i dodajemy tłumaczenie dla języka angielskiego
layout_en.xml<entry key="Home.Copyright.clause">All rights reserved</entry>
Komunikaty, które chcielibyśmy wyświetlać w komponentach zapisujemy do plików plików /WEB-INF/components/resources/WEBAPP_{język}.xml. Następnie w plikach komponentów (np. MyComponent.vm) odwołujemy się do tłumaczeń jak poniżej:
MyComponent.vm$res.get('MyComponent.MyInfo')
Podmiana istniejących obrazków (logo)
Aplikacja czytelnika oprócz obrazków dynamicznych(np. miniaturki obiektów cyfrowych) wyświetla obrazki statyczne(np. logo). Te drugie można wymieniać na swoje. Zaleca się by wymienić obrazki na obrazki o takich samych wymiarach. Jeśli nowe obrazki mają inne wymiary należy przetestować wyświetlanie takiego obrazka w różnych widokach i w różnych przeglądarkach: dla komputera stacjonarnego, tabletu i telefonu komórkowego.
Przykład: Wymieniamy domyślne logo dlibry na własne.
Otwieramy plik /WEB-INF/layout/custom_templates/custom_layout_library.vm i dodajemy wpis ze ścieżką do naszego nowego logo:
#macro(logoPath)
	${homepageUrl}/style/dlibra/${styleVariant}/my/logo/path/logo.svg
#end
Przykład: Wymieniamy domyślne logo dlibry na własne z uwzględnieniem wersji językowej loga.
Otwieramy plik /WEB-INF/layout/custom_templates/custom_layout_library.vm i dodajemy wpis ze ścieżką do naszego nowego logo. Korzystając ze zmiennej ${userLanguage} uwzględniamy loga w różnych językach:
#macro(logoPath)
	#if ( ${userLanguage} == "en" )
  		${homepageUrl}/style/dlibra/${styleVariant}/my/logo/path/logo_en.svg
	#elseif ( ${userLanguage} == "de" )
    	${homepageUrl}/style/dlibra/${styleVariant}/my/logo/path/logo_de.svg
	#else
		${homepageUrl}/style/dlibra/${styleVariant}/my/logo/path/logo_pl.svg
	#end
#end
Przykład: Wymieniamy dowolny obrazek na własny.
- W celu dokonania podmiany wystarczy, że namierzymy ścieżkę pod którą leży nasz stary obrazek i na jego miejscu wkleimy inny. Aby sprawdzić ścieżkę do obrazka najlepiej jest się posłużyć przeglądarką Google Chrome.
- Otwieramy interesującą nas stronę w naszej bibltiotece cyfrowej. Klikamy prawym przyciskiem myszy w obrazek i z menu kontekstowego wybieramy zbadaj. Wyświetli się nam okienko z zaznaczonym elementem w kodzie html. Będzie to element img. Sprawdzamy jaką wartość ma atrybut src tego elementu i w ten sposób odczytujemy ścieżkę do pliku na naszym serwerze. Np wartość src="http://demo.dl.psnc.pl/dlibra/default/img/pictures/my-picture.svg" wskazuje na katalog /webapp/style/dlibra/default/img/pictures/my-picture.svg
Modyfikacje css
Style, z których korzysta aplikacja czytelnika znajdują się w katalogu /styles/dlibra/default/css/. Istnieje możliwość nadpisania istniejących styli lub dodania nowych. Najopdpowiedniejszym do tego miejscem jest plik /styles/dlibra/default/css/custom.css