The functions listed below are available after an appropriate reconfiguration of the dLibra system. The set of formats can be changed; the best time to do that is during the implementation of the software.
File Formats Available for Multi-Format Objects
- DjVu – a format consisting of a set of files in the DjVu format
- PDF – a format consisting of a single file in the PDF format
- image gallery – a format consisting of a set of graphics files in the JPG format (the JPG extension; for more information about it, see here)
- audio – a format consisting of a single audio file
- video – a format consisting of a single audiovisual file
- EPUB – a format consisting of a single file in the EPUB format
- MOBI – a format consisting of a single file in the MOBI format
Adding a Multi-Format Object
In order to create a new multi-format object, the user should:
- From the element list, select the directory or group object in which the new object is to be placed.
- From the context menu, select the “New object” function. You can also use the
 button on the toolbar or select an appropriate option from the main menu (“New object...” from the Management menu). After the “New object” function has been selected, the new object creator will be initiated.
 The first step of the new object creator is to select the main file of the object (see the image below). The user should select the “multi-format” option as the data source and indicate the directory on the local drive of the computer (by clicking the “Select a directory” button) which contains the subdirectories with objects in various formats (for the list of the object formats available by default, see the File Formats Available for Multi-Format Objects point. The directories for those formats should be named as follows:
- for the DjVu format – a directory labeled “DjVu”,
- for the PDF format – a directory labeled “PDF”,
- for the image gallery format – a the directory labeled “Gallery”,
- for the audio format – a directory labeled “Audio”,
- for the video format – a directory labeled “Video”,
- for the EPUB format – a directory labeled “EPUB”, and
- for the MOBI format – a directory labeled “MOBI”.
Next, the default format of the object should be indicated (in the “Default format” column). That format will be displayed when the website user does not indicate directly the format he or she wants to use (for example, after the object content icon has been clicked).
By default, the Editor Application detects the main file for every format automatically, but the main file for each format can be modified manually in the “Main file” column. The application identifies the main files for the formats in accordance with the following general rules:
- DjVu: Plikiem głównym jest plik o nazwie index*.djvu lub plik o nazwie index*.htm lub plik o nazwie index*.html, gdzie * oznacza dowolny ciąg znaków alfanumerycznych, znaku minus „-“ lub podkreślenie „_“.
- PDF: Plikiem głównym jest plik znajdujący się w katalogu. Plik powinien mieć rozszerzenie .pdf.
- Galeria zdjęć: Plikiem głównym jest plik wygenerowany automatycznie przez Aplikację Redaktora (presentation.xml) w przypadku galerii wielu obrazów lub plik graficzny jeśli w katalogu jest pojedynczy plik.
- Audio: Plikiem głównym jest plik znajdujący się w katalogu. Plik powinien być z rozszerzeniem .mp3, przygotowany w taki sposób by wspierał tzw. pobieranie progresywne.
- Wideo: Plikiem głównym jest plik znajdujący się w katalogu. Plik powinien być z rozszerzeneim .mp4, przygotowany w taki sposób by wspierał tzw. pobieranie progresywne.
- EPUB: Plikiem głównym jest plik znajdujący się w katalogu. Plik powinien być z rozszerzeniem .epub.
- MOBI: Plikiem głównym jest plik znajdujący się w katalogu. Plik powinien być z rozszerzeniem .mobi.

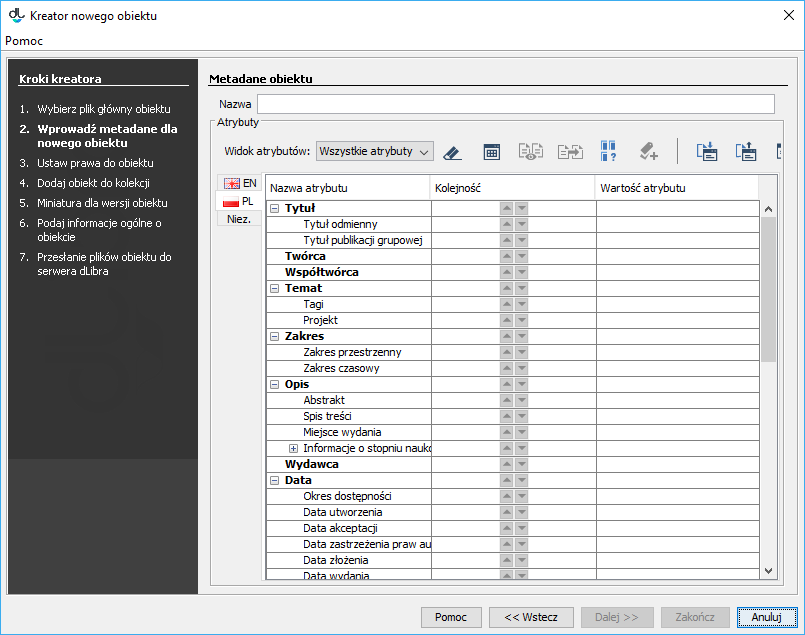
- In the second step (see the image below), the user should describe the new object with the use of a set of attribute values. For details about it, see the Bibliographic Description Editor chapter. In order to be able to go to the next step, the user must enter the name of the new object (in the “Name” field). By default, the name is created on the basis of the bibliographic description, by combining the name of the author and the date of edition (for information about changing the method of creating a default name, see the Configuring the Editor Application section. For example, if the title is “Fables”, the author is “John Smith”, and the date of edition is “2004”, then the name will be “John Smith, 2004, Fables” – with the author first, followed by the date of edition and the title. Whenever a user changes the bibliographic description, the name is updated. Off course, a user can also enter a different name or modify the default name. In such a case, the automatic update will be blocked. In order to proceed to the next step of the creator, the user should click the “Next” button.
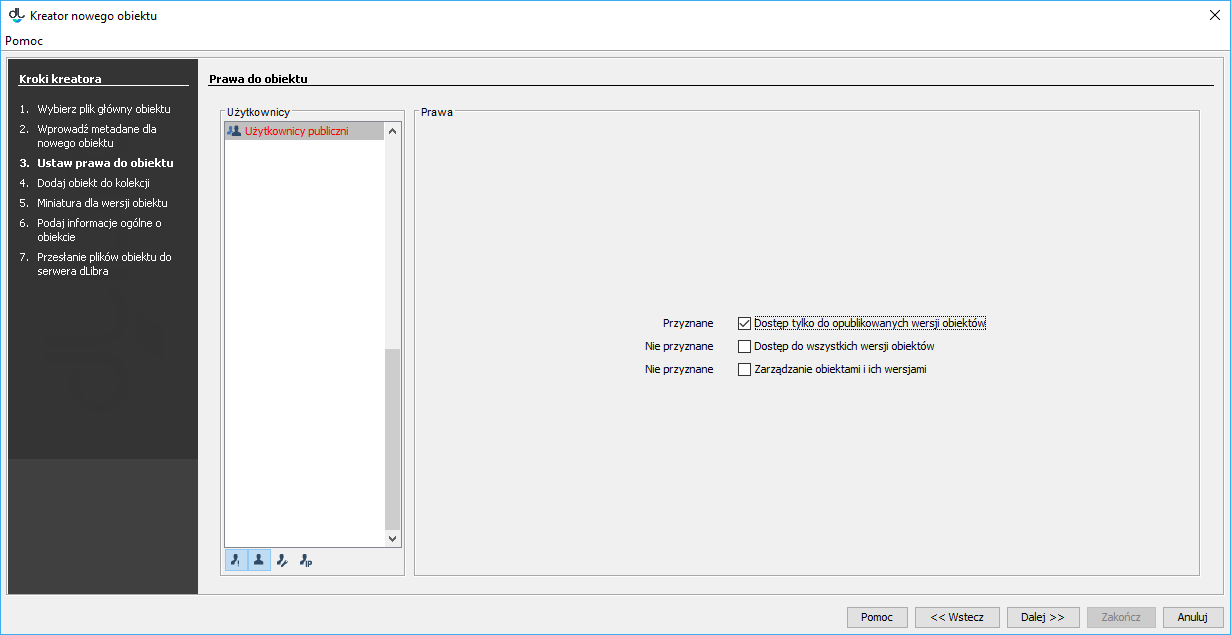
- The third step (see the image below) is to assign access permissions for the object to users. Permission assignment is described in the part about the permission editor. In order to proceed to the next step of the creator, the user should click the “Next” button.
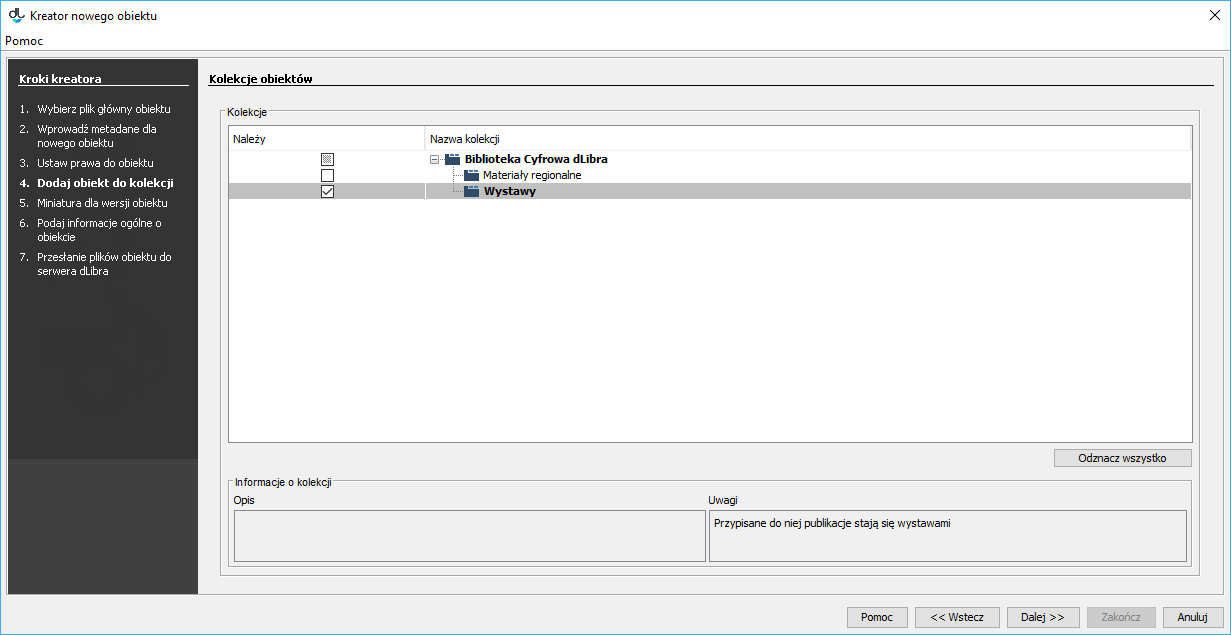
- In the fourth step (see the image below), the user should assign the object to a collection. The way to do that is described in detail in the section about the Editor for Assigning Objects to Collections. In order to proceed to the next step of the creator, the user should click the “Next” button.
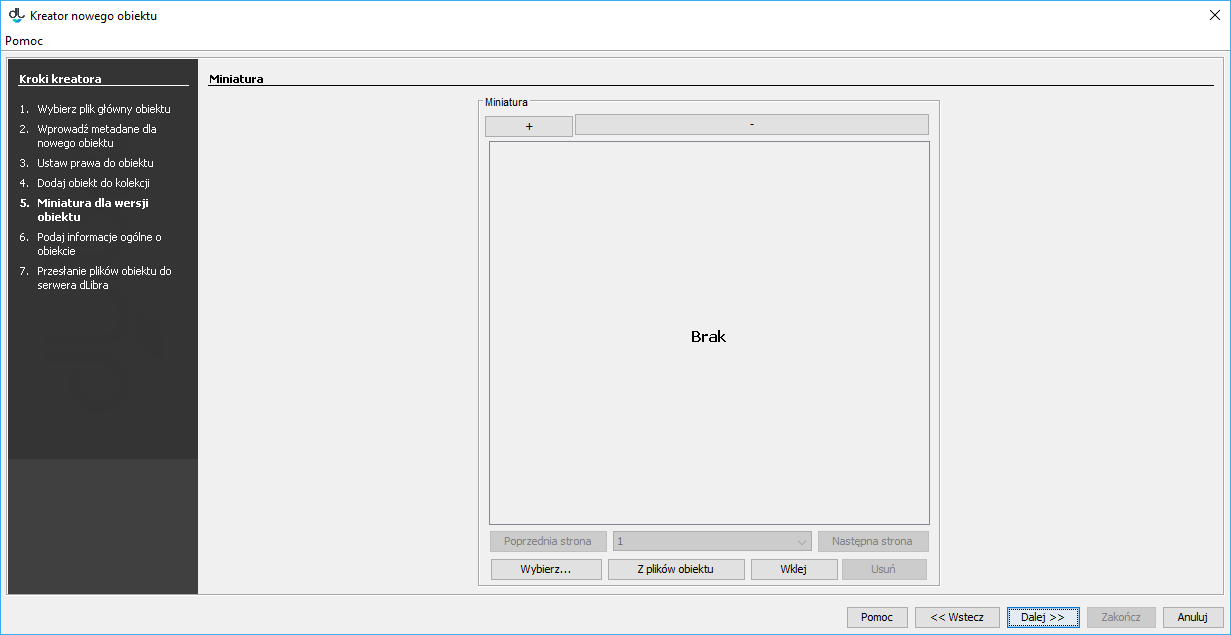
- In the fifth step (see the image below), the user can indicate the thumbnail for the object. A thumbnail is a graphical representation of an edition; it is shown to web page users next to the information about the edition. In order to upload a thumbnail from a graphics file on the drive, the user should click the “Select” button and indicate the file. If there is an extension of the miniatureProvider type installed in the application and if it supports the file types selected in the first step of the creator, the application will be able to automatically generate thumbnail suggestions. For that purpose, the user should click the “From object files” button. If the application has generated many thumbnails, the user can select the correct one by indicating its number on the expandable list (thumbnail numbers usually correspond to the numbers of the pages of the object) or review the subsequent thumbnails by clicking the “Previous page” and “Next page” options. The user can also paste an image from the clipboard (with the use of the “Paste” button). If the application is configured properly, it will automatically reduce the thumbnail size to the required size (for the configuration details, see here). The user can also make the thumbnails bigger or smaller by clicking the buttons labeled + and -. In order to proceed to the next step of the creator, the user should click the “Next” button.
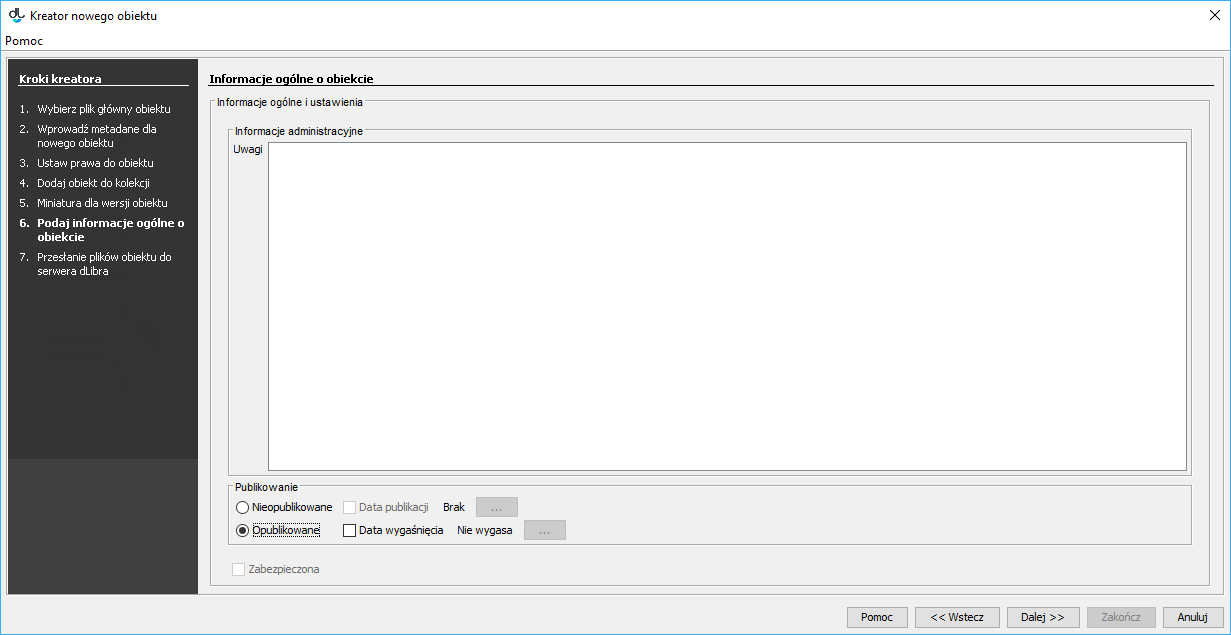
- In the sixth step (see the image below), the user can provide some general information about the object, in the following sections:
- “Notes” – administrative information about the object;
- “Publishing” – a panel for determining if the first edition is to be published, determining the date of automatic publication in the future (if applicable), and determining the date of expiry (withdrawal of the edition; if applicable); and
- “Protected” – a checkbox for determining if the object is to be protected against copying (that option only applies to objects which contain files supported by the Reader Application extensions for protecting files).
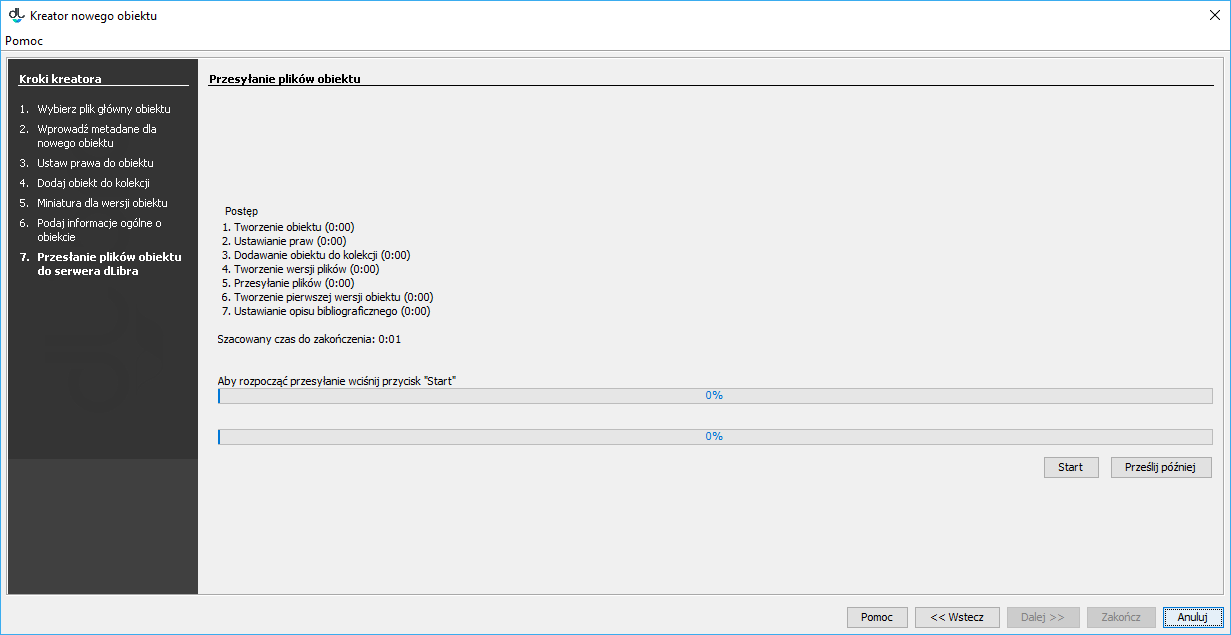
- Przesyłanie plików na serwer jest ostatnim krokiem kreatora obiektu (rysunek poniżej). Aby stworzyć obiekt na serwerze, należy przycisnąć przycisk Start. Proces ten można wstrzymać i wznowić wybierając ponownie ten sam przycisk. W trakcie tworzenia obiektu na panelu Postęp wykazane są wszystkie operacje jakie muszą zostać wykonane w celu poprawnego utworzenia obiektu. Nazwa aktualnie wykonywanej czynności jest zaznaczona pogrubioną czcionką. Dla każdej czynności wyświetlany jest czas (w sekundach) jaki upłynął podczas jej wykonywania. Paski postępu informują o zaawansowaniu wykonywanych czynności. Po utworzeniu obiektu wyświetlane jest krótkie podsumowanie. W trakcie tworzenia obiektu na serwerze możliwe jest anulowanie tej czynności (poprzez zamknięcie okna, np. naciśnięcie przycisku Anuluj). Dodatkowo redaktor może odłożyć proces tworzenia obiektu na później poprzez wybranie przycisku Prześlij później. Po wybraniu przycisku Prześlij później wszystkie informacje związane z obiektem zapisywane są na dysku komputera, a okno kreatora zostaje natychmiast zamknięte. Wszystkie obiekty do wysłania później trafiają na specjalną listę, którą można zarządzać w oknie przesyłania obiektów przeznaczonych do wysłania później. Mechanizm ten opisany jest szczegółowo tutaj). Pozwala on na przygotowanie zestawu obiektu do przesłania, a następnie uruchomienie przesyłania wszystkich obiektów na raz (np. uruchomienie przesyłania pod koniec pracy). Powinno to zwiększyć liczbę przesyłanych obiektów ze względu na to, że redaktor nie musi czekać na przesłanie każdego obiektu ponieważ przesyłanie może odbywać się poza godzinami pracy.
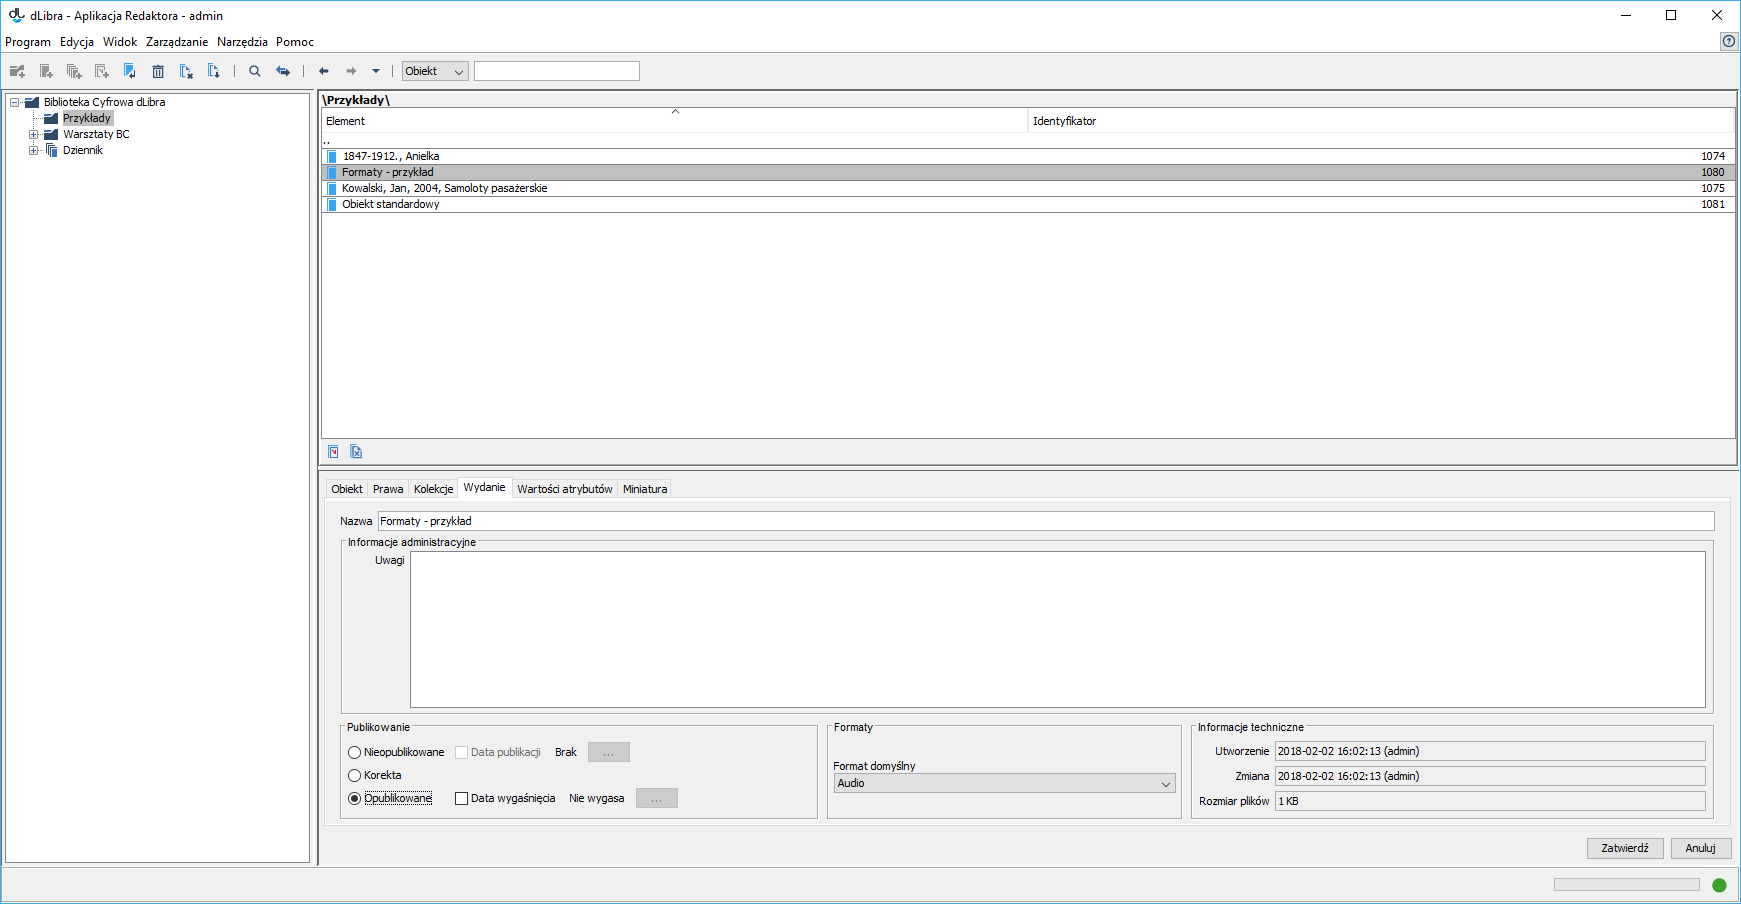
Zmiana formatu domyślnego
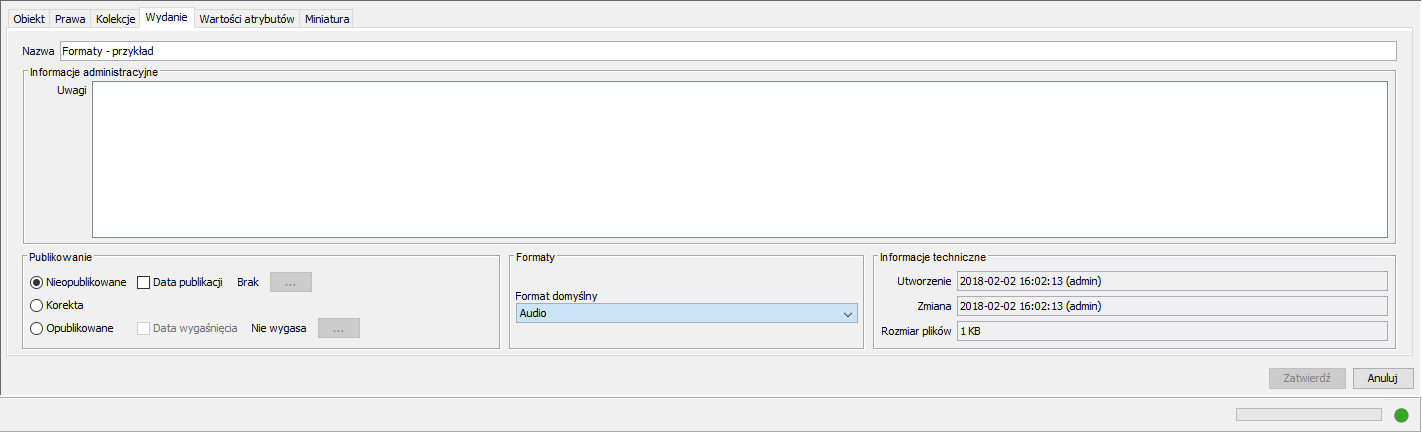
Aby zmienić domyślny format obiektu wieloformatowego, należy wskazać obiekt, dla którego ma nastąpić zmiana, następnie w oknie własności przejść na zakładkę Wydanie (rysunek poniżej) i z listy rozwijanej w polu Formaty wskazać nowy domyślny format i potwierdzić chęć wprowadzenia zmiany klikając przycisk Zatwierdź.
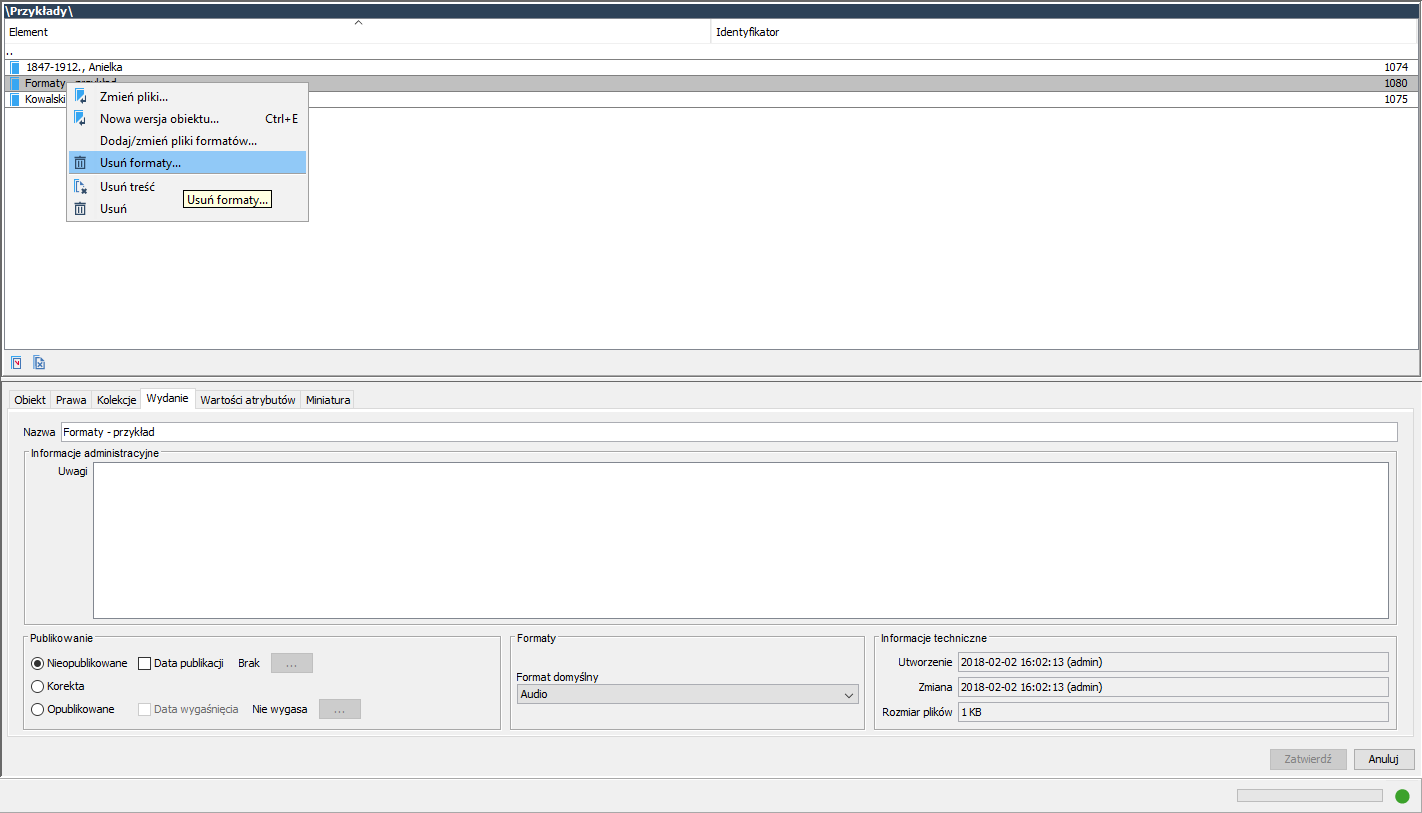
Usuwanie formatu
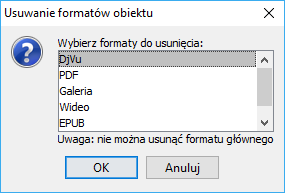
Przed wprowadzeniem zmiany należy odpublikować obiekt. Aby usunąć jeden z formatów obiektu wieloformatowego, należy wskazać obiekt, dla którego ma zostać wprowadzona zmiana, następnie w oknie własności przejść na zakładkę Wydanie (rysunek poniżej) i odpublikować go zaznaczając opcję Nieopublikowane w sekcji publikowanie. Kolejnym krokiem będzie kliknięcie obiektu prawym przyciskiem myszy i wybranie opcji "Usuń formaty...". W nowym oknie (rysunek poniżej) należy wskazać format (poza domyślnym) który ma zostać usunięty i kliknąć przycisk Usuń.
Zmiana standardowego obiektu na obiekt wieloformatowy
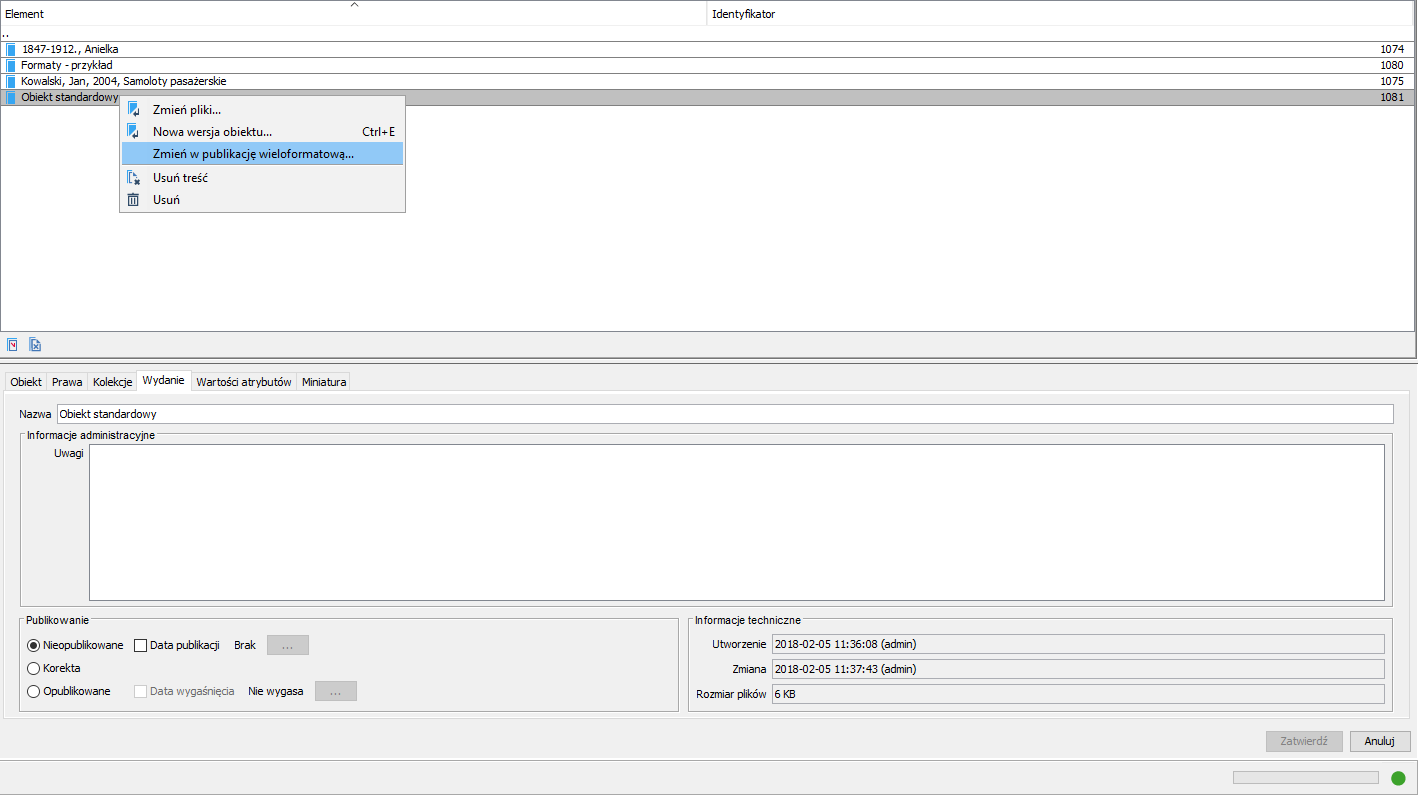
Aby zamienić obiekt standardowy w obiekt wieloformatowy, należy na liście elementów wybrać obiekt i w oknie własności obiektu przejść na zakładkę Wydanie, następnie odpublikować go zaznaczając opcję Nieopublikowane w sekcji publikowanie. Kolejnym krokiem będzie kliknięcie obiektu prawym przyciskiem myszy i wybranie opcji "Zmień w publikację wieloformatową..." (rysunek poniżej).
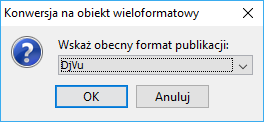
Kolejny krok to wskazanie nowego formatu dla obecnej zawartości obiektu (rysunek poniżej).
Modyfikacja plików formatów, obiektu wieloformatowego
- Aktualizacja plików formatu
Aby zaktualizować pliki obiektu wieloformatowego dla wybranego formatu należy dwukliknąć wybrany obiekt lub nadusić klawisz enter gdy obiekt jest podświetlony w aplikacji redaktora (jest to widoczne na poniższym rysunku).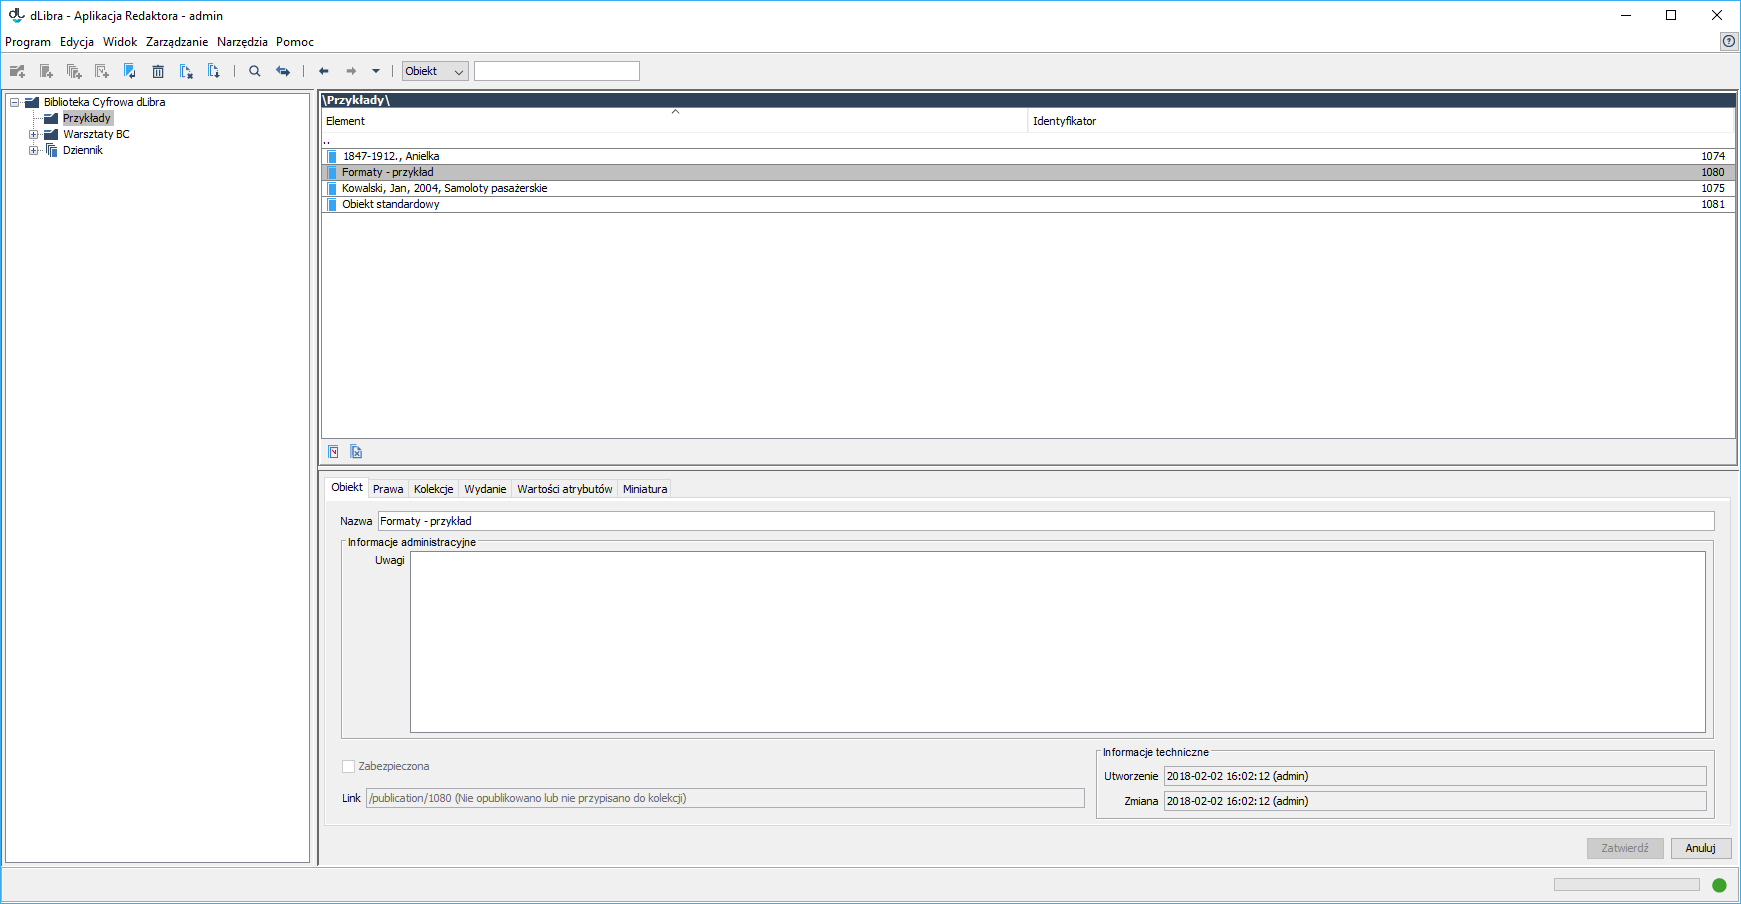
Spowoduje to wyświetlenie listy formatów, przypisanych do modyfikowanego obiektu.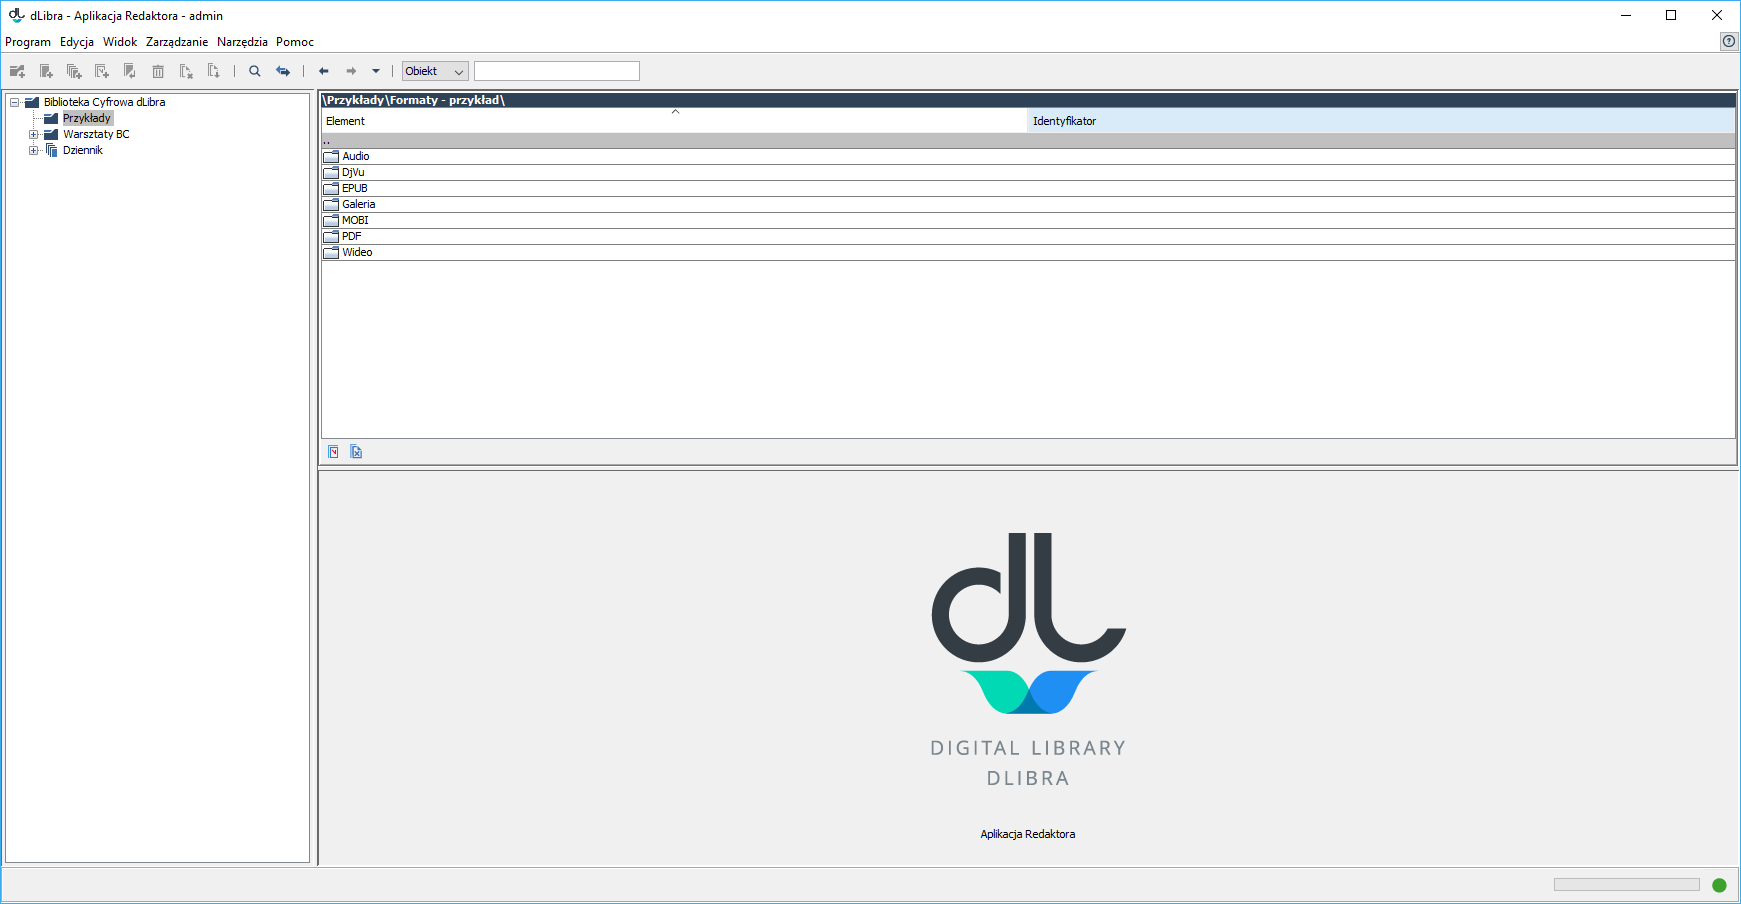
Następnie należy dwukliknąć lub nadusić klawisz enter dla wybranego formatu, który ma zostać zmodyfikowany. Ukazana zostanie w ten sposób lista plików wchodzących w skład danego formatu. Po kliknięciu prawym przyciskiem myszki w nazwę pliku, możliwa będzie zmiana zawartości pliku. (rysunek poniżej). Należy pamiętać, aby zmieniany plik miał taką samą nazwę, jak plik uprzednio dodany.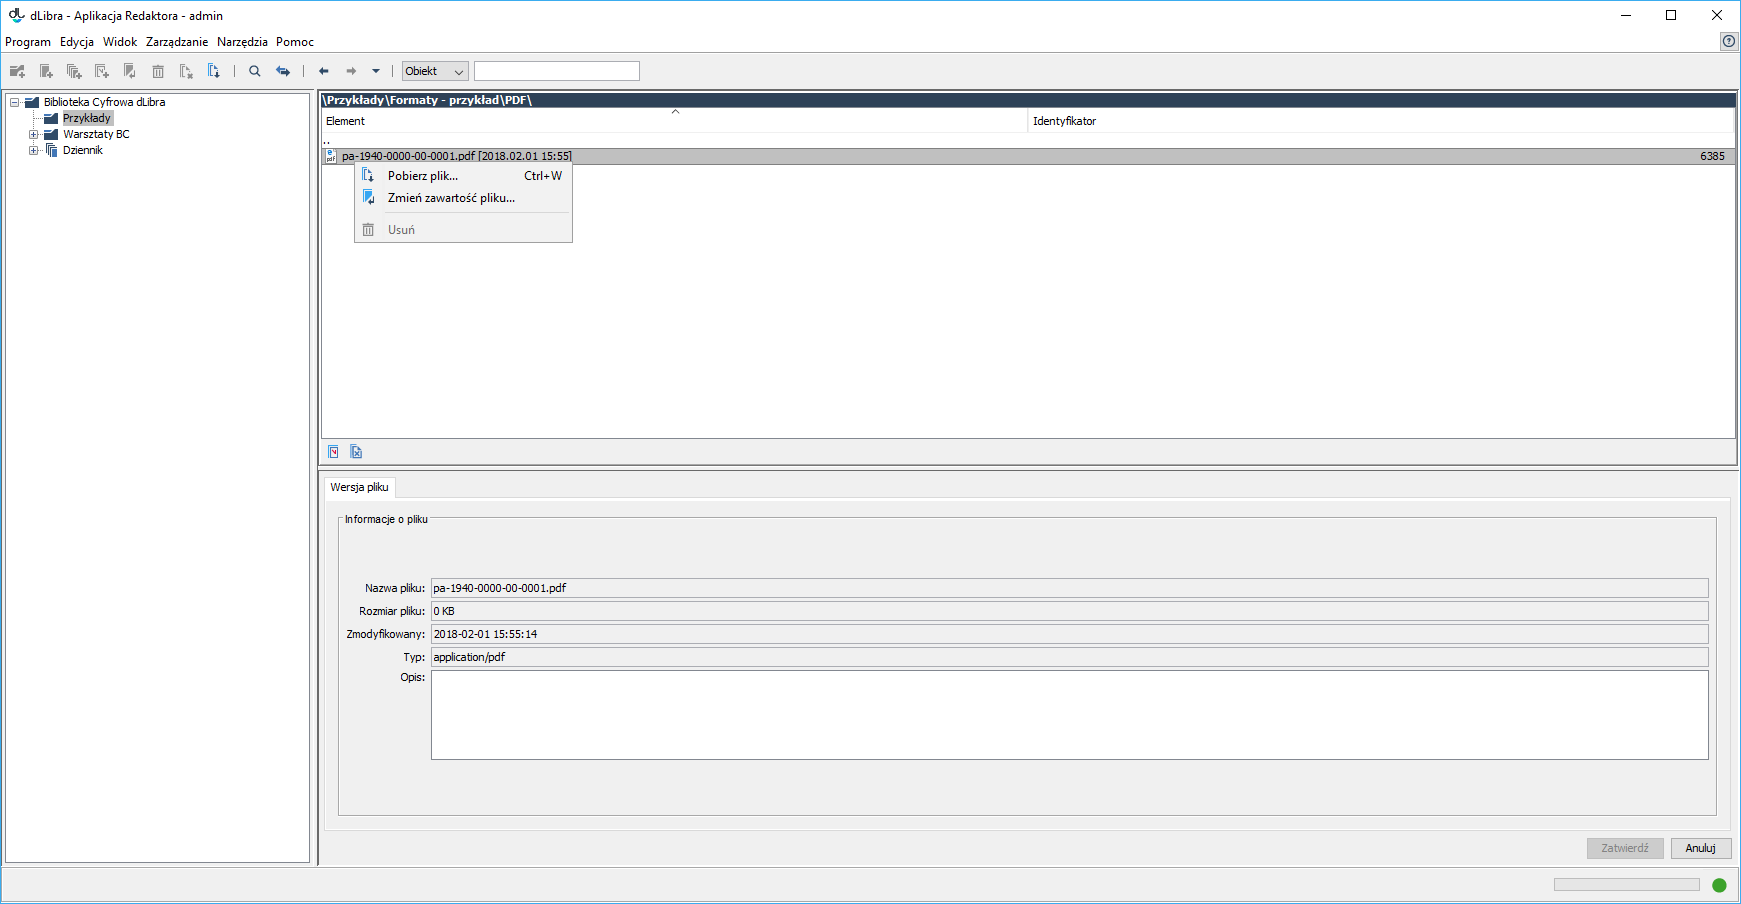
Po wskazaniu nowego pliku - przycisk "Wybierz plik" (rysunek poniżej), możliwe będzie przesłanie go na serwer dLibra klikając przycisk start (kolejny rysunek poniżej).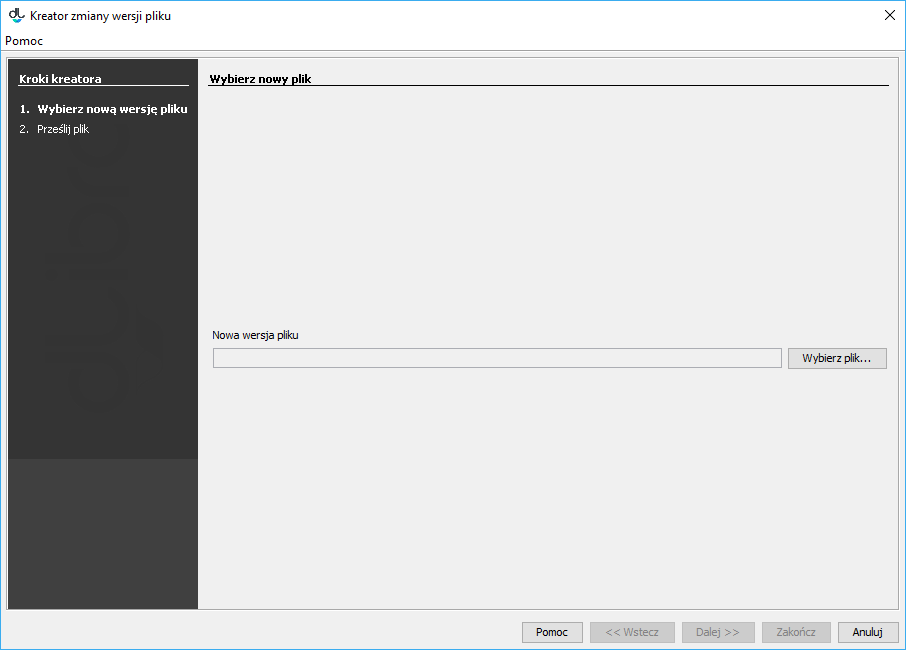
- Dodawanie / zmiana plików formatu
Przed wprowadzeniem zmiany należy odpublikować obiekt. Aby dodać pliki danego format obiektu wieloformatowego, należy wskazać obiekt, dla którego ma zostać wprowadzona zmiana, następnie w oknie własności przejść na zakładkę Wydanie (rysunek poniżej) i odpublikować go zaznaczając opcję Nieopublikowane w sekcji publikowanie. Kolejnym krokiem będzie kliknięcie obiektu prawym przyciskiem myszy i wybranie opcji "Dodaj / zmień pliki formatów...".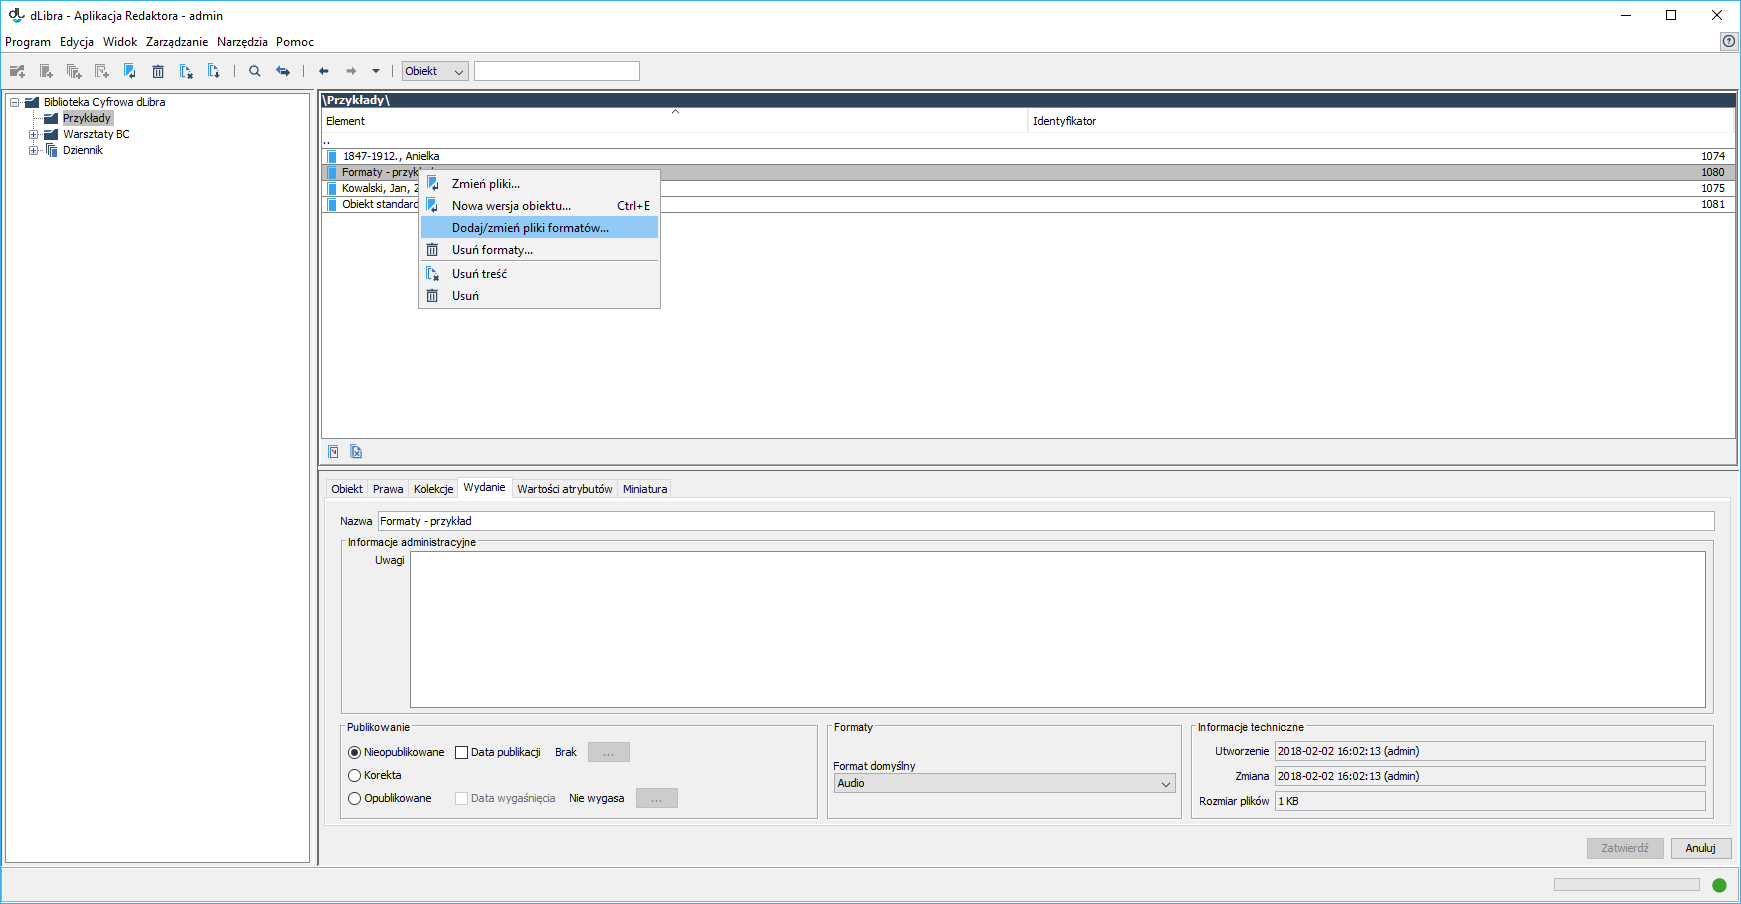
W nowym oknie (rysunek poniżej) należy wskazać katalog zawierający podkatalogi z plikami formatów, które mają zostać dodane lub zmienione dla już istniejących.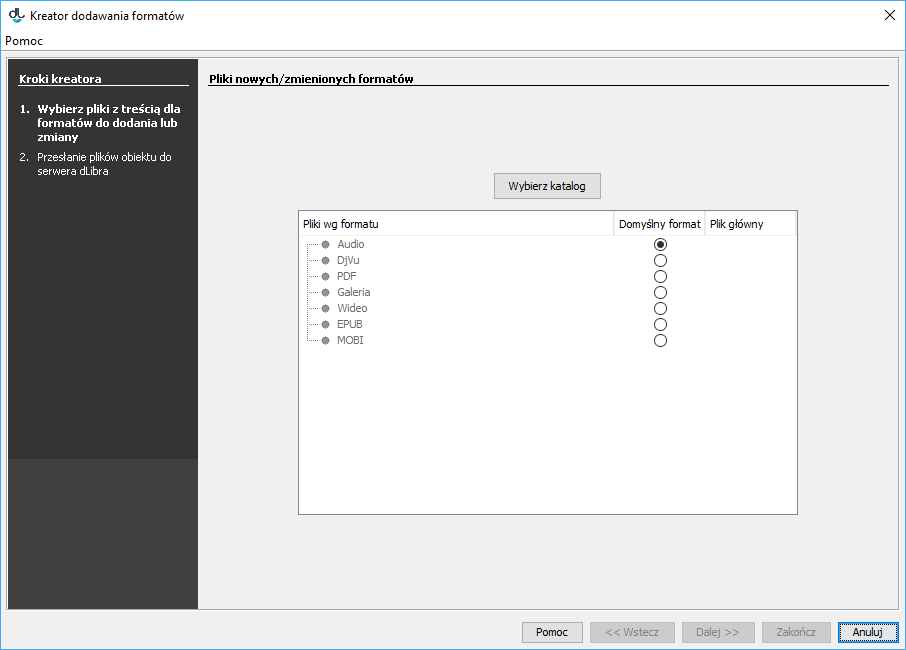
Po wybraniu katalogu, należy wskazać domyślny format plików dla obiektu wieloformatowego oraz wskazać plik główny dla każdego z formatów, jeśli ma być inny od rozpoznanego automatycznie.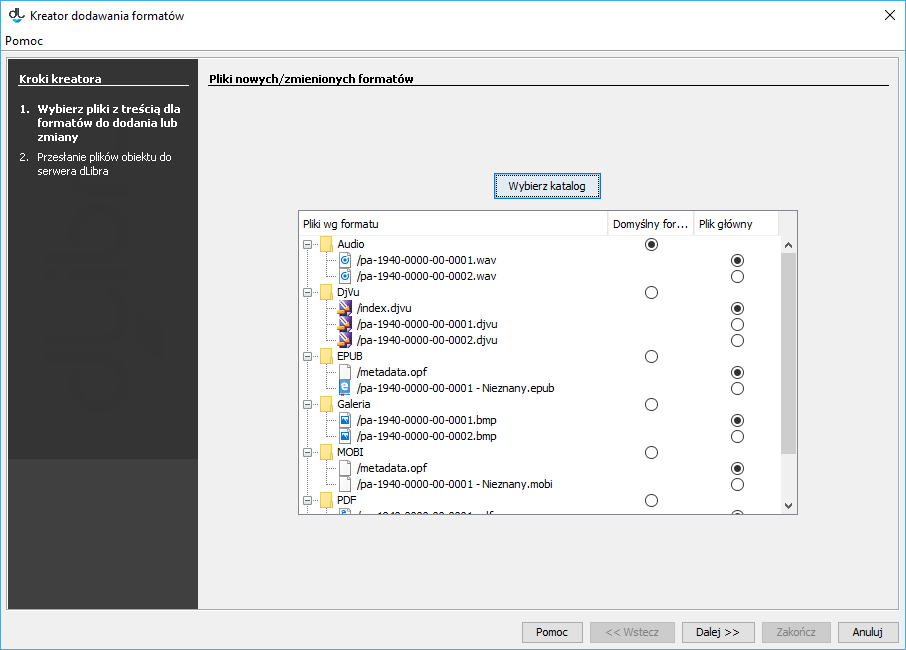
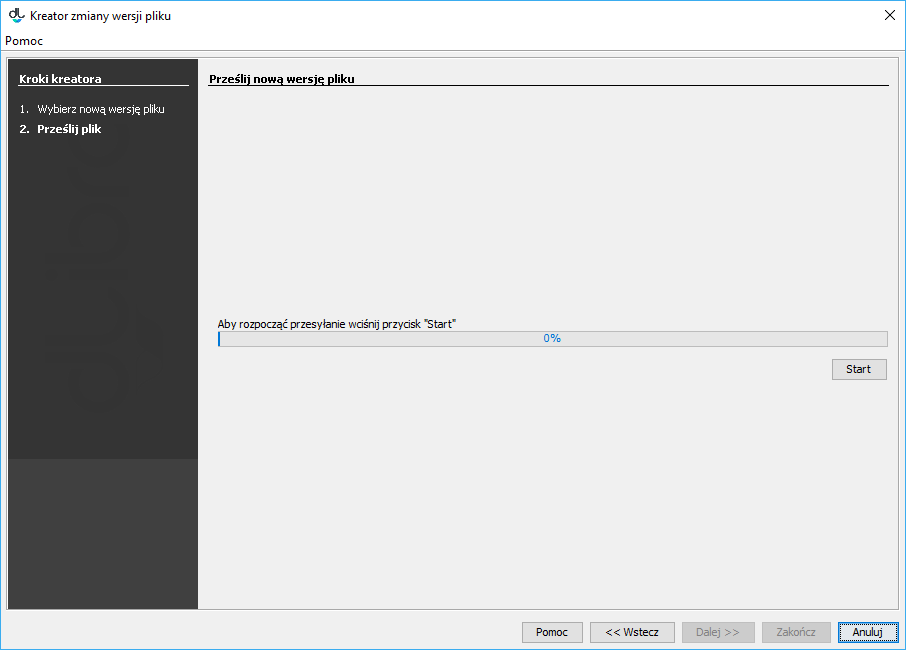
Kolejnym krokiem jest przesłanie plików obiektu wieloformatowego do serwera dLibra klikając przycisk start.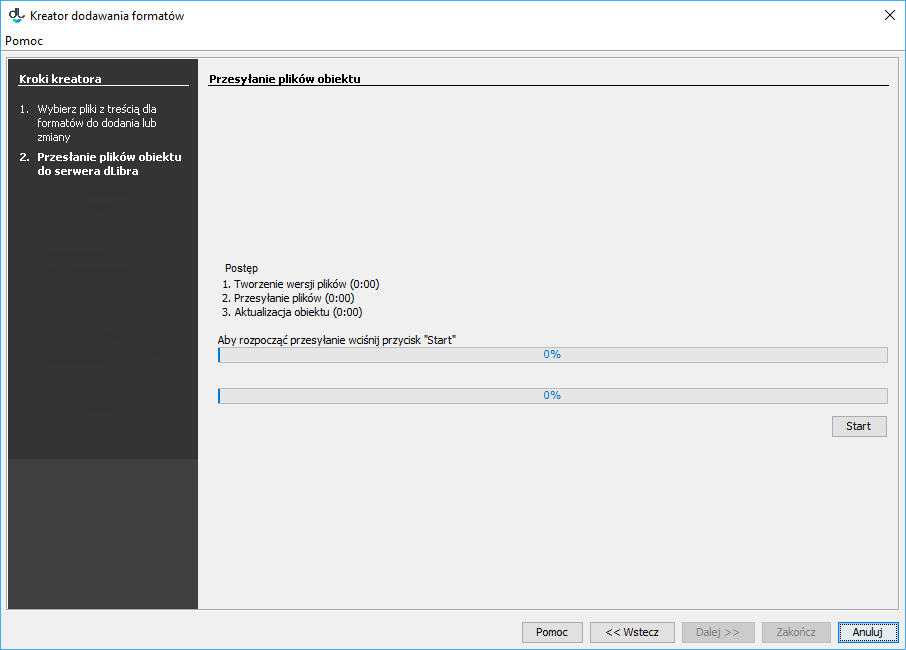
Ostatnią czynnością jest ponowne opublikowanie obiektu poprzez zaznaczenie opcji Opublikowane na zakładce Wydanie, w sekcji Publikowanie.