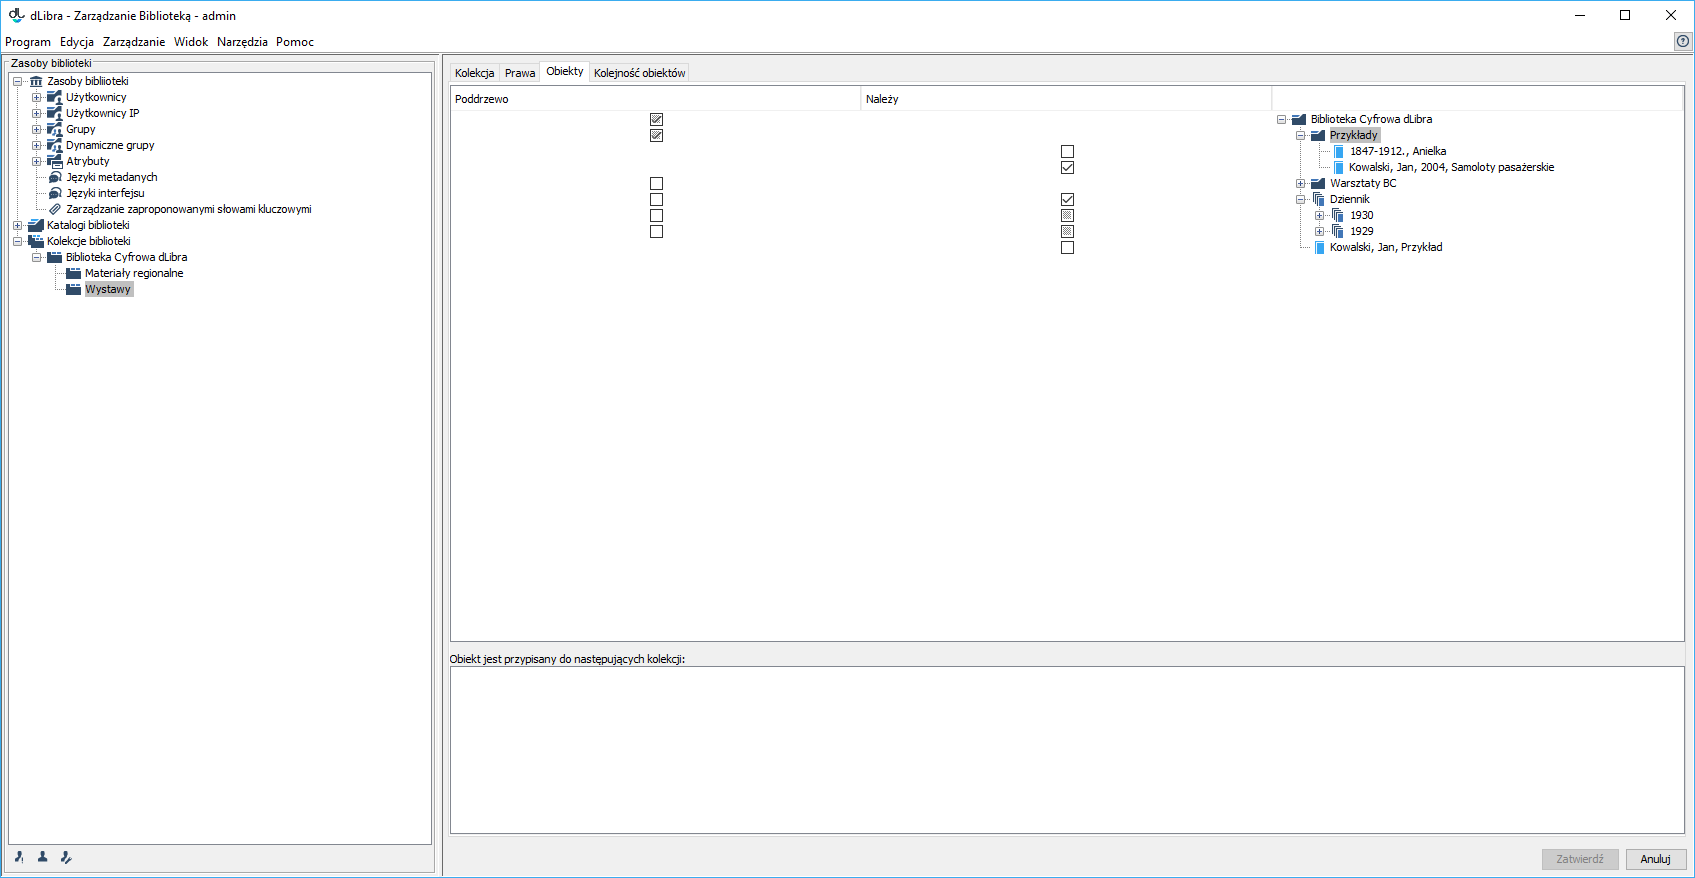
Objects can be managed within a collection. A user who has the permission to manage the given collection can add objects to it and remove them from it, with the use of the interface located in the “Objects” tab and available when the collection has been selected in the “Collection tree”.
Once a collection has been selected in the “Collection tree”, the user can edit the assignment of the object to that collection, in the “Objects” tab (see the image above).
In the upper part of the “Objects” tab, there is a table for editing the assignment of an object to a collection. That table has three columns. In the right column, there is the library structure (the same as in the directory tree but uneditable). The other two columns contain checkboxes, each of which represents the status of the assignment of the object in the given row to a collection. The column on the left (“Belongs”) is related to directories and single objects (for a group object, is for informative purposes only – it cannot be modified). The middle column, on the other hand, is only related to group objects. A checkbox can have one of three possible states:
- – that state is possible for every element. In the case of a directory and a group object in the left column, that state means that no object there belongs to the selected collection. In the case of a standard object and a group object in the right column, that state means that the object does not belong to the collection.
- that state is only possible for a directory and a group object in the left column. It means that some subordinate objects which belong to the collection, and some do not.
- – that state is possible for every element. In the case of a directory and a group object in the left column, that state means that all objects there belong to the selected collection. In the case of a standard object and a group object in the middle column, that state means that the object is assigned to the collection.
By modifying the checkbox states, we modify the assignment of objects to collections.
All changes must be confirmed by clicking the “Confirm” button at the bottom of the property window.


