Managing Library Users
In order to create a new library user:
- In the library tree, select the users’ node or user node.
- Right-click the node and select the “New user...” option from the context menu. You can also find that option in the “Management” menu at the top.
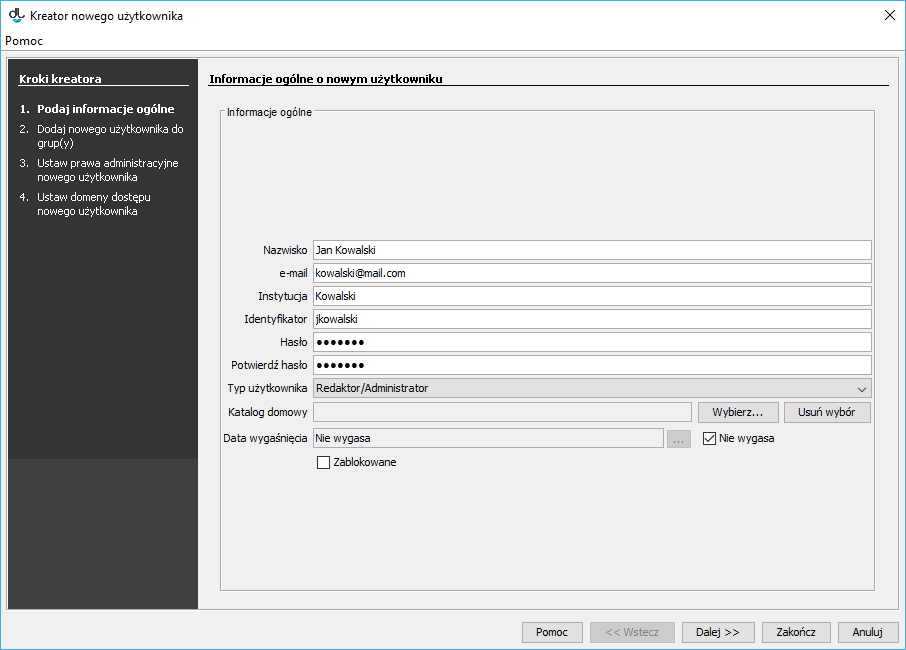
- In the first step of the creator (see the image below), enter the general data of the new user; the identifier, email address, and password are obligatory. Also, one of three user types should be selected:
- administrator/editor – a user of the dLibra system who can log into all applications (including the Administrator Application and the Editor Application); users of that type administer the dLibra system or create the content of the library;
- reader – a user of the web pages of the library; a user of that type cannot log into the the Administrator Application or the Editor Application but can log into the library website and change the information about his or her own account; and
- reader with restrictions – a user with the same abilities as user’s except the ability to change the information about his or her own account.
- In this step, it is also possible to determine the user’s home directory, where publications added by the user by means of the website interface will be added (for more information about it, see here). For that purpose, click the “Select” button, indicate the target directory in the window (if needed, expand the appropriate nodes in the hierarchy), and click “Confirm”.
In order to determine the date of the expiry of the account, deselect the “Does not expire” field and click the neighboring button with the ellipsis character. There will appear a control element with a calendar, where you should select a date of expiry and click the “OK” button. From the day indicated as the date of the expiry of the account, the user will not be able to log into it. An expired account can be reactivated in the user editor by selecting the “Does not expire” field or by entering a later date of expiry. The “Blocked” field has a similar function, except that clicking it blocks access to the account immediately.
| Anchor |
|---|
| newUserWizardGeneral |
|---|
| newUserWizardGeneral |
|---|
|
| labelimg |
|---|
| Kreator nowego użytkownika - dane ogólne |
|---|
| Kreator nowego użytkownika - dane ogólne |
|---|
|
|
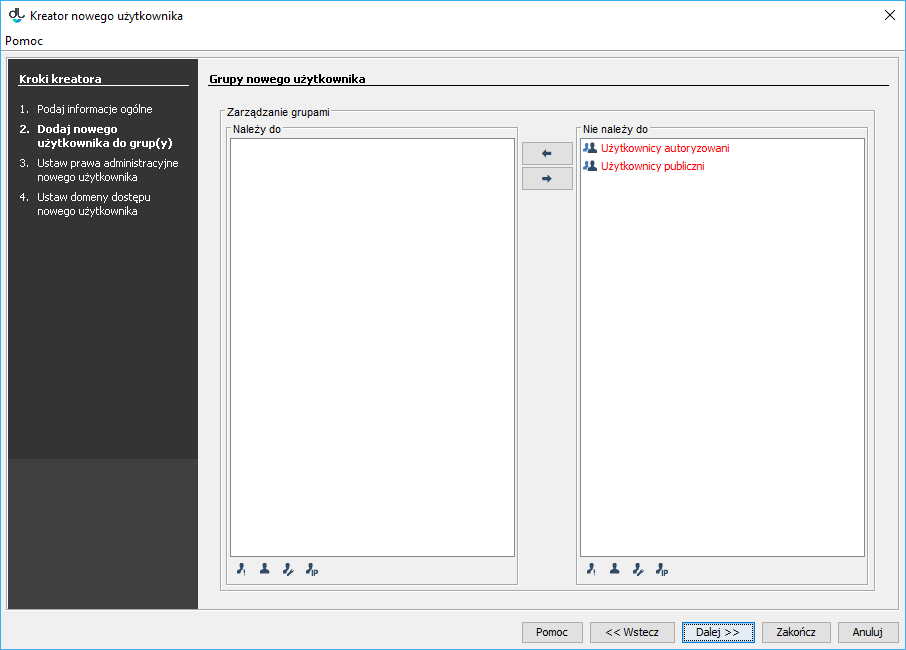
5. In the second step of the creator (see the image below), you can assign a new user to groups. The “Belongs to” list contains the groups to which the user will belong, while the “Does not belong to” list contain the groups to which the user will not belong. In order to go to the next step, click the “Next” button.
| Anchor |
|---|
| newUserWizardGroups |
|---|
| newUserWizardGroups |
|---|
|
| labelimg |
|---|
| Kreator nowego użytkownika - przypisywanie do grup |
|---|
| Kreator nowego użytkownika - przypisywanie do grup |
|---|
|
|
In the third step (see the image below), assign administrative permissions to the user (for detailed information about them, see here). In order to go to the next step, click the “Next” button.
| Anchor |
|---|
| newUserWizardRights |
|---|
| newUserWizardRights |
|---|
|
| labelimg |
|---|
| Kreator nowego użytkownika - przypisywanie praw administracyjnych |
|---|
| Kreator nowego użytkownika - przypisywanie praw administracyjnych |
|---|
|

|
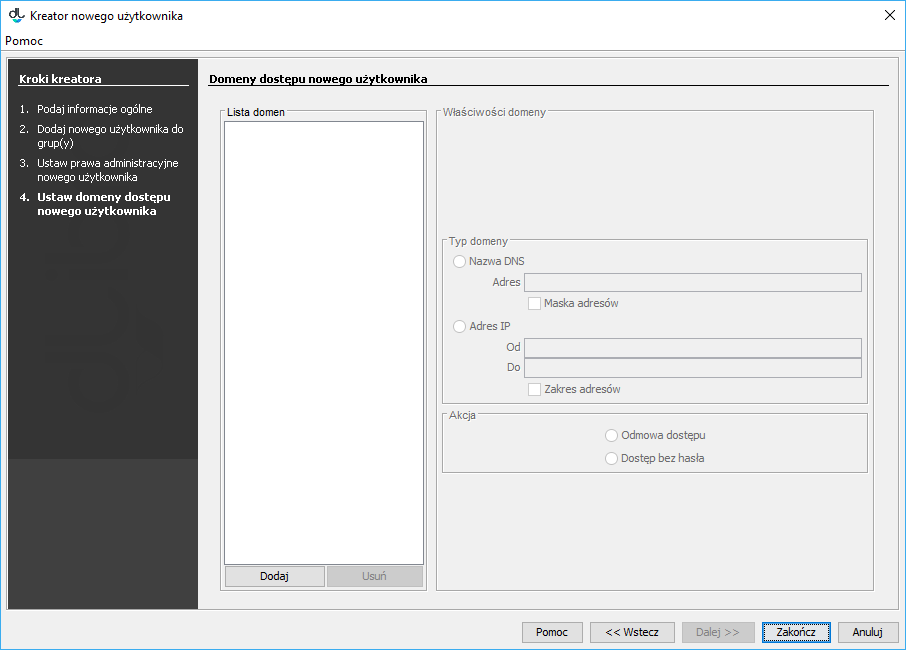
6. In the fourth (and last) step (see the image below), you can add access domains for the user. For a detailed description of access domain management, see here.
| Anchor |
|---|
| newUserWizardDomains |
|---|
| newUserWizardDomains |
|---|
|
| labelimg |
|---|
| Kreator nowego użytkownika - definiowanie domen dostępu |
|---|
| Kreator nowego użytkownika - definiowanie domen dostępu |
|---|
|
|
In order to remove a user:
- In the library tree, select the user to be removed.
- Click the “Remove”
 button or use the context menu or the expandable menu.